
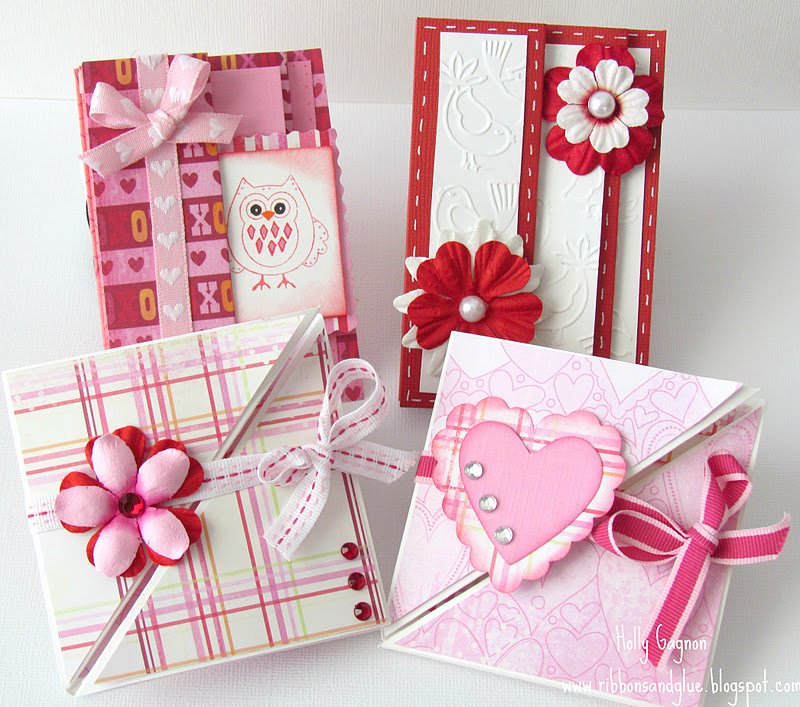
This Valentine’s Multi-Fold Card Tutorial will help you create easy and unique cards for all those Valentine Loves. These lil’ multi-fold cards are simple to make and what I like about them the most, is they give you a reason to use up some of them scrap pieces of paper you’ve been hoarding piling up and can’t seem to throw out ’cause you totally heart the collection.
{This post contains affiliate links I am referencing product too}
Valentine’s Multi-Fold Card Tutorial
Whenever I’m making these multi-fold cards, I’ll repeat over and over to myself “Measure Twice, Score Once“, “Measure Twice, Score Once“. Even though I may think I’m a paper carpenter, I still make measurement errors…Ack!
How to make a Triangular Tri-Fold Card
Supplies needed:
Score Board in Inches or Score Board in Metric
1 piece of 3 1/2 x 10 1/2 inch cardstock or 9 cm x 27 cm
Patterned paper
Ribbon
Image or sticker to fit on front of card


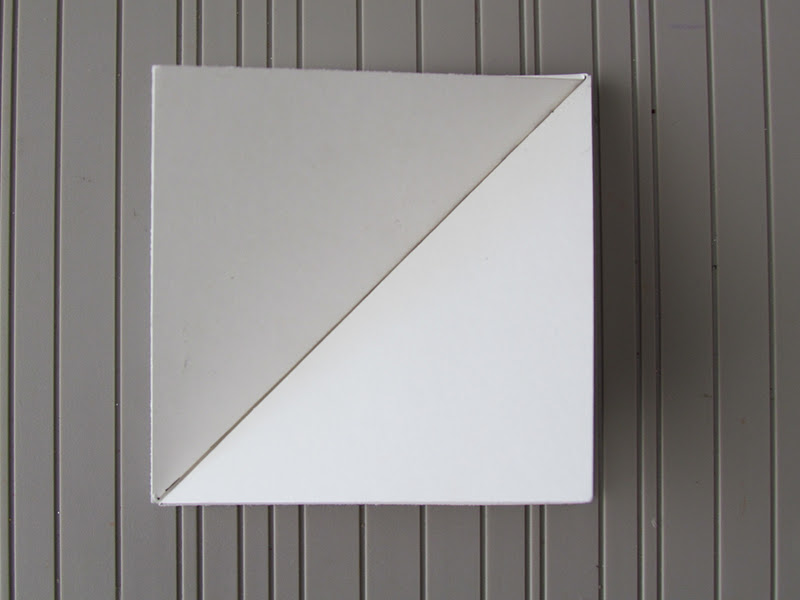
There you go, a simple little triangle tri-fold card that can be embellished in a million ways.


Wrap a ribbon around your card and tie it with a bow to keep it closed. When adding your image to the front of the card remember to only adhere it to one side of the triangle flap. Otherwise, you won’t be able to open the card.
How to make Accordion Fold Card
Supplies needed:
Score Board in Inches or Score Board in Metric
1 piece of 4 1/2 x 11 inch cardstock or 11 cm x 28 cm
Patterned paper and embellishments

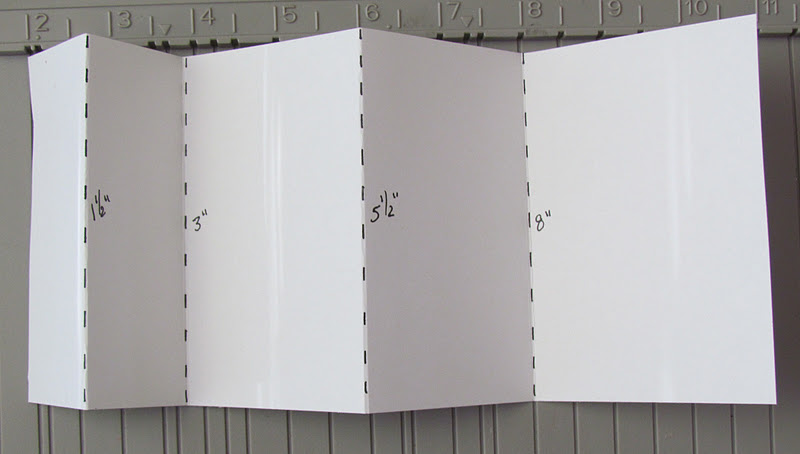
Starting on left side, mountain and valley fold on the score lines

Now you know how to make Valentine’s Multi-Fold Cards! Your card making skillz will never be the same. Happy Card Making!


 CRAZY4 CHRIST says
January 22, 2012 at 12:14 pmVery cool folds!! Love the way you used Kristal’s stamps!!
Kristan
GCDT-Sister
 Shelly says
January 22, 2012 at 7:17 pmVery cool! Thank you for the tutorials! Great cards!
Happy Sunday!
Shelly
 Linda Therrien says
January 22, 2012 at 10:19 pmLove you card, always looking for differnt ways to make cards and your tutorial is great.
Linda
GC Jr. DT sister
 PinkBlingCrafter says
January 23, 2012 at 5:19 amLove the different folds and the cards are so Sweet for Valentines!! Thanks for the tutorial on how to create the folds!!
Hugs,
Norma
 Miranda says
January 23, 2012 at 2:32 pmI love these cards! Great tutorial! I can’t wait to try them.
Miranda 🙂
GCJRDT Sista
http://www.nanasscrapspot.com
 MeGlo says
January 23, 2012 at 3:54 pmSo pretty! Thanks for clear instructions! Am going to make the CUTES Valentine’s day cards!
 Maureen Reiss says
January 23, 2012 at 6:24 pmThese are really cute!! Thanks for the tutes!!
 Jill says
January 23, 2012 at 7:19 pmHOLLY! GREAT Tutorial! Love these! Great idea! Smiles, Jill
p.s. go check out my blog…it might look different… 🙂
 Heather P says
January 25, 2012 at 2:18 amHolly, these cards are adorable, and thank you for the tutorial- I’ve been looking for some fun new cards- thanks for sharing!!
Hugs,
Heather P 🙂
 Dawn says
January 25, 2012 at 4:00 pmI love your cute little Valentine cards. Your tutorial on card folding was awesome. I am definitly going to try it. Something different than the same ole folded card. Thank you so much for sharing. Hugs, Dawn
 kramer_buffy says
January 26, 2012 at 2:08 amholly, I just pinned you! LOL!!!
— dalis
 CREATIVE M says
January 28, 2012 at 12:53 amAbsolutelty Adorable!!!
http://craftingwithcreativem.blogspot.com
 Jill says
January 29, 2012 at 3:32 amThanks again for joining my link party! I hope you join again tomorrow! SMiles, Jill
 Leah Crowe says
February 2, 2012 at 4:14 pmahhh, such beautiful cards!! Great tutorial too! 🙂 Thanks so much for linking up with us at Paper Issues!! 🙂 Hugs, Leah
 NJ Stamping Queen says
February 4, 2012 at 12:03 pmLove these cards! Thank you for such a wonderful tutorial. I will look forward to trying these soon!
 Dortesjs says
March 7, 2012 at 5:58 amso lovely thanks for idea
 yumary BAZANTA MORENO says
November 14, 2012 at 6:37 pmbeautiful!!!
 Laura Q says
December 11, 2012 at 4:43 amThank you for that wonderful tutorial! I love your cards! Your tutorial was so easy to follow. I created some cards using this and I linked your blog to my site to give you credit. http://lauraqscreations.blogspot.com/2012/12/triangular-tri-fold-and-my-cricut.html
Thanks for sharing! Have a blessed Christmas!
 Laura Q says
December 11, 2012 at 4:44 amI found your tutorial on Pinterest
 Wendy L says
July 20, 2013 at 3:02 pmGreat tuts, will be trying these, thanks, xxxxxxxxxx
 Donna Ellis says
February 1, 2014 at 8:08 pmThanks for the tutorials! Will enjoy using these card folds very much! hugs, de
 Michelle Little says
May 25, 2015 at 4:12 amI love love love these card ideas. Thank you for sharing. How can I make the adorable owls?
 Holly Gagnon says
May 25, 2015 at 7:09 amThank you Michelle. The owl is just a stamp I shaded in. Holly 😉