
I’ve been wanting to make a big, vertical, Christmas sign for a while now. The other day when my daughter and I were hanging up Christmas decorations, she mentioned she loves the name Noel. That’s about all ll it took to inspire me to make this big ole’ Noel sign for my Front Porch.

Noel Sign
{this post contains affliate links referencing products used}
The wood board measures at 4 x 12 inches which is stained, painted and distressed. You can follow my tutorial on how to achieve this DIY rustic sign technique from another sign I made. This whole sign was easy to make, actually the most time spent was waiting for the paint to dry. No joke. Now that the weather is colder, paint seems to take like 4-evah and a day to dry.

I used my Silhouette to cut out the word NOEL using Impact font and traced the letters on to the board with a pencil.

I then hand painted the letters using used Decoart paint in Primary Red. After the letters were dry, I used my sander again to lightly distress them a little. Come on, who wants to see perfectly painted letters anyways?
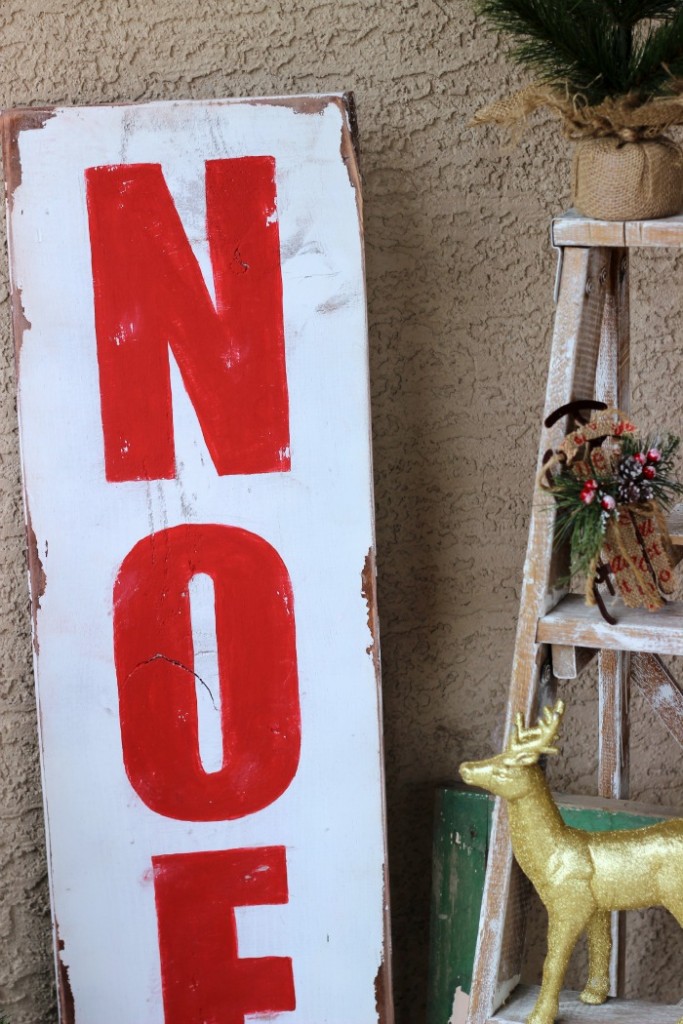


Lala love my DIY Noel Sign! It’s just the look I was going for on my Rustic Glam Front Porch , was super easy to make and my daughter loves it too.

Click to view more projects like this DIY Noel Sign:


 Laura Kelly says
December 19, 2015 at 9:04 amLOVE this Holly! I might just paint today. 🙂
 Claudette Sanders says
October 30, 2016 at 10:21 amJust a tip;. Next time try using some steel wool instead sandpaper to give it the distressed look. It works wonders! Especially in areas that are hard to get to!
 Holly Gagnon says
November 2, 2016 at 6:26 amYes, steel wool or an electric sander work great for distressing. Thanks for stopping by. Holly 🙂
 Gwen Kennedy says
November 11, 2017 at 9:36 amHolly, how do you like your Silhouette cutting machine? Is it worth the money?
 Holly Gagnon says
November 11, 2017 at 10:55 pmHi Gwen. I’ve used some sort of die cutting machine for years so yes, it’s totally worth the money to me. But, I guess it depends on how much you would use it yourself but they are lots of fun and you can create amazing things! Hope that helps- Holly 😉
 Samanthe says
November 15, 2017 at 3:24 amWhat are the measurements of your board?
 Holly Gagnon says
November 15, 2017 at 10:05 pmHI Samanthe, I used a big board. Probably 2ft x 5 ft. Thanks for asking. Holly