
This Lucky St. Patrick’s Day Pallet Sign made with scrapbooking paper and my Silhouette CAMEO was really easy to make and is a perfect addition to any rustic St. Patrick’s Day decor.

{This post contains affiliate links referencing products used}
Lucky St. Patrick’s Day Pallet Sign
I actually made this project for a Silhouette Challenge Group on Facebook. When I first started blogging, entering weekly challenges was all I did. Seriously, I had a notebook filled with the days challenges started and I would try to make a project that incorporated 2 or 3 of the challenges into one. I did this for years, then I just stopped. So, when I saw the Silhouette Challenge this month was Typography/Word Art, I thought I’d go back to my roots and play along with a St. Patrick’s Day project.

To make this Lucky Pallet Sign, I used my Silhouette CAMEO to cut out the Lucky cut file using coordinating Lucky You patterned papers from Echo Park Paper then used Mod Podge the adhere the letters on to a piece of scrap pallet wood.

The end of the Lucky Pallet Sign is wrapped with Rainbow Cord and Natural Cord and a gold shamrock sticker is adhered in the center. Isn’t Word Art great?! Such a simple way to make a statement.

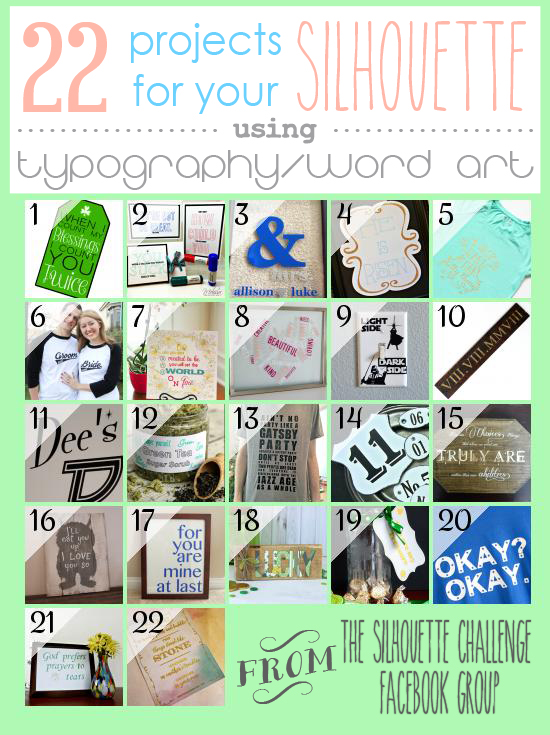
Click on the links to view more Typography/Word Art Silhouette Projects
1. My Paper Craze // 2. The Stamp Doc // 3. Peanut Life Adventures // 4. Creative Ramblings // 5. Pitter and Glink // 6. The Thinking Closet // 7. Single Yet Married Mom // 8. unOriginalMom // 9. // 10. Where The Smiles Have Been // 11. From Whine to Whine // 12. Adventures in All Things Food // 13. Practically Functional // 14. Patina Paradise // 15. Please Excuse My Craftermath… // 16. Weekend Craft // 17. Two Purple Couches // 18. Ribbons & Glue // 19. TitiCrafty // 20. Simply Kelly Designs // 21. Confessions of an Overworked Mom // 22. Get Silvered

Click to on images to view more Silhouette CAMEO projects like this Lucky St. Patrick’s Day Pallet Sign


 Ellen Christian says
March 9, 2015 at 10:10 amVery cute! What a fun St. Patrick’s Day craft!
 Holly Gagnon says
March 10, 2015 at 9:31 pmThank you! Holly 🙂
 Michelle from Weekend Craft says
March 9, 2015 at 8:05 pmHolly this came out great. I make pallet signs all the time and never thought to use patterned paper! Genius I am going to have to try this. Great job!
 Holly Gagnon says
March 10, 2015 at 9:32 pmThank you! A little secret about using paper is it can be temporary too. Holly 🙂
 Katie says
February 18, 2016 at 5:38 pmDo you just mog podge the back of the paper or do you go over the letters too to make sure they stay?
 Holly Gagnon says
February 18, 2016 at 7:53 pmHi Katie. I just hot glued the letters on to the wood. No Mod Podge needed. Thanks- Holly
 Pam - GetSilvered says
March 10, 2015 at 8:11 pmHolly, I love the patterns of the paper you used. Great combo and your sign looks terrific.
I know this sounds silly but it never occurred to me to decorate wood with paper! I guess I’m so used to seeing it decorated with vinyl, or paint and stencils. Thanks for the inspiration 🙂
 Holly Gagnon says
March 10, 2015 at 9:35 pmThank you Pam! Yes, paper may not be the ideal media on wood but it’s actually adheres great and can be temporary too. Holly 🙂
 Leah Briick says
March 15, 2015 at 12:48 amI just love this! the selection of papers is awesome and it inspired me to go grab a piece of wood from the garage and that stack of paper on the shelf and make something for Easter….since I am gonna be a little late for St. Patty’s. 🙂 The twine on the end sets if off for a nice finishing touch.
 Holly Gagnon says
March 15, 2015 at 1:42 pmGreat! So glad I inspired you to make a project with paper and wood. Thank you- Holly 🙂
 Kristy gd says
March 18, 2015 at 1:51 pmWow. This is really great! I love the different papers you choose. Now I want one of these! Let the plotting begin….. 😉
 Holly Gagnon says
March 18, 2015 at 9:55 pmThank you! Holly 🙂
 Michele Kelly says
February 18, 2017 at 4:44 pmWhat size is the board you used for the LUCKY art?
 Holly Gagnon says
February 19, 2017 at 4:58 pmHi Michelle, I used 2 small pieces of scrap pallet wood so it’s about 7 x 9 inches. Thanks for asking. Holly
 Andrea Greco says
January 28, 2020 at 10:04 amHow is this 2 pieces of wood?? I keep looking at the photos and it looks like 1 solid piece of wood. Did you sand and stain it first? Also, it looks like the letters are raised-up a bit – did you use foam-board or thick cardboard or is it really just a single sheet of card-stock?
 Holly Gagnon says
February 9, 2020 at 8:32 pmHello Andrea- Yes it is one small piece o pallet wood. The wood is the natural pallet wood color. The letters are not raised, they are offset with coordinating paper. Thanks for visiting. Holly
 Allison Arisman says
March 29, 2017 at 6:22 pmThis is adorable! It’s so hard to find cute DIY St. Patrick’s Day crafts.
 Holly Gagnon says
March 29, 2017 at 8:30 pmThanks you so much Allison! Holly 🙂
 Clare says
February 20, 2020 at 12:48 amHi. Could you please explain to me how you made each letter a different paper? “LUCKY” is one word, correct? (Not individual letters). I’m new to my cameo. I know how to get the file and cut it, but not using a variety of papers for one word. Also, I understand the concept of the word being offset, but could you explain how you did that and what you used to offset it?
Thank you so much! I would love to make this cute little sign with my craft group.
 Holly Gagnon says
February 25, 2020 at 8:52 pmHello. The word LUCKY is cut from a cut file with individual letters, that is why the paper are different for each one. I can’t remember if I used offset on the letters but it’s easy to do using the CAMEO offset function. Easy project for sure for a craft group. Thanks for looking! Holly