
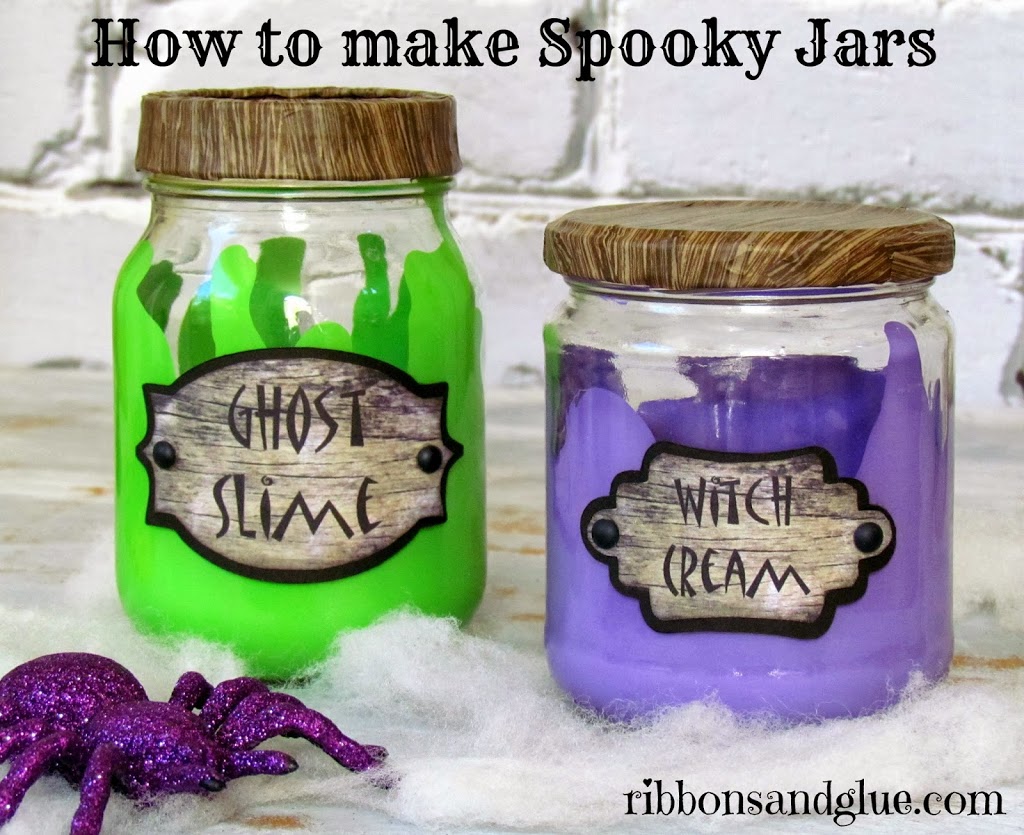
Spooky Halloween Jars
{this post contains affliate links referencing products used}
.
This project is exactly why I’ve started to keep hoard empty jars around. I’ve always favored a good Mason Jar but now I’m becoming really fond of any jars. Salsa, jelly, spaghetti sauce… they all can be a good up-cycle.

How to make a Ghost Slime Jar
- Squeeze paint into the bottom of a jar.
- Tilt the jar around to move the paint along the sides.
- Turn the jar upside down.
- Let the paint do it’s dripping magic.
You might need to assist the paint a little with some jar tapping and rotating depending on the look you want. This project is like watching paint dry…literately!
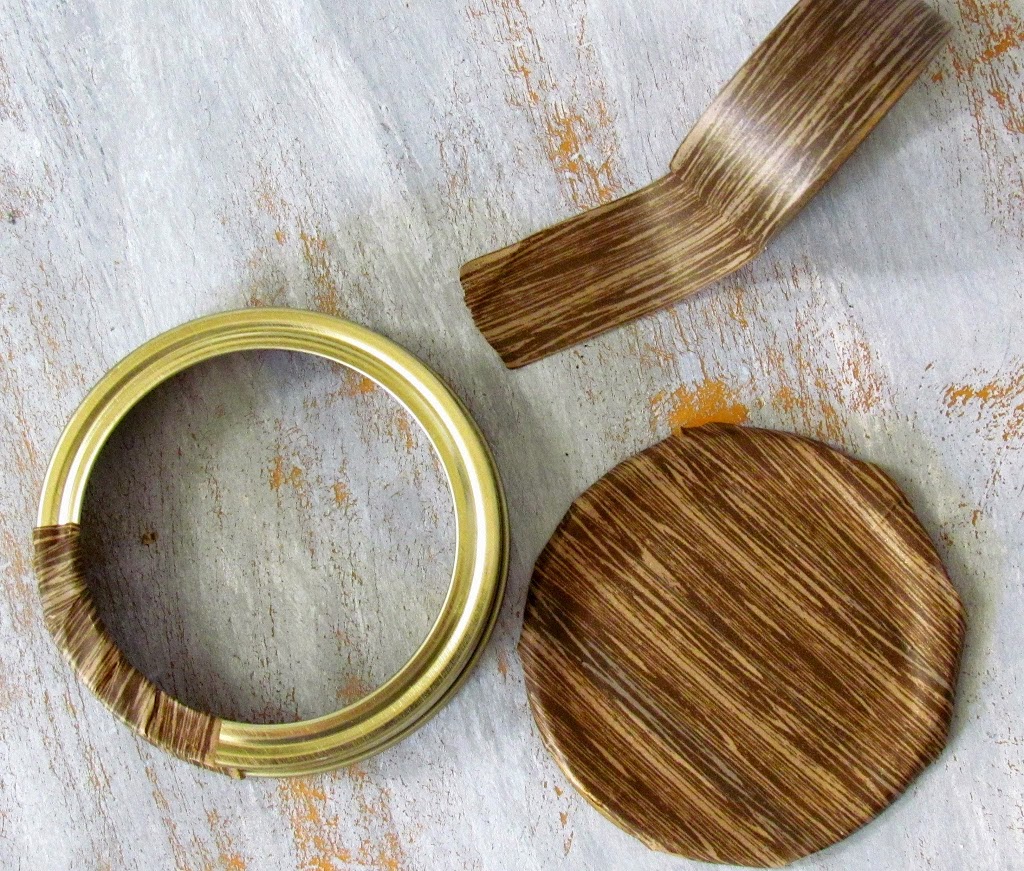
For the the Spooky Jar ids, I covered them with wood grain washi tape. Just adhere the tape on to the lid and wrap it around until all the metal is covered. Makes for an awesome faux finish, right?


After I used Print & Cut for the labels, I distressed them with ink, added black Candy Dots and adhered them on to the front of jars.
I have to give credit to my kiddos for coming up with the jars names too. I couldn’t think of anything creative. I showed my kids the blank jars and they thought of something in like 2 secs. Freaky.


Click on images to view more projects like these Spooky Halloween Jars


 Rhonda Emery says
October 9, 2013 at 12:40 pmI love these jars so cool and spooky. great for Halloween.hugs
 Kimber Ashley says
October 9, 2013 at 8:25 pmThese are the cutest! I had to pin right away! I love that you used old jars you had on hand.
 Melony says
October 10, 2013 at 4:31 pmI love the technique of swirling the paint around inside the jars! So adorable
http://www.mel-designs.typepad.com
 Mayra Duran-Hernandez says
October 10, 2013 at 7:25 pmWhat a great idea !!! These are so cute !
Mayra
Mayrasdesigns.blogspot.com
 apieceoflifespie.com says
October 16, 2013 at 11:52 amOk, just love this idea!