
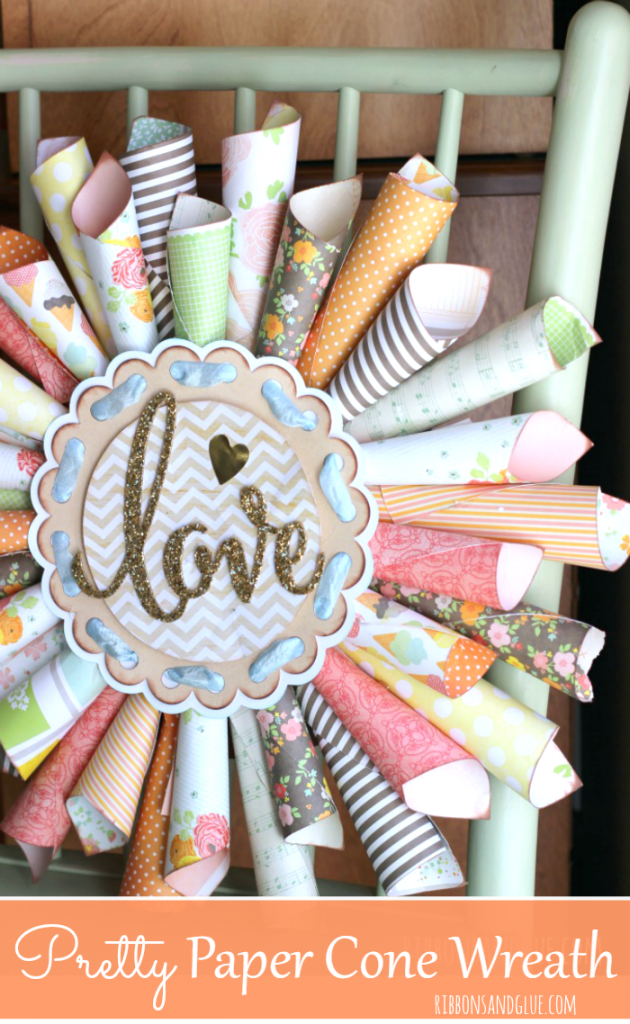
I’ve update this Pretty Paper Cone Wreath! Scroll down to see my updated version!
Oooh.. Hello, pretty Paper Cone Wreath! I just love these types of wreaths. There bold, make a statement and easy to make!

{this post contains affliate links referencing products used}
Gorgeous papers, huh? The papers are from the Dear Lizzy Neapolitan collection, it’s an oldie but goody. I’ve always loved the colors of these papers, it was hard to cut them up…..sigh….but totally worth it now.
How to make a Paper Cone Wreath:

Supplies Needed to make a Paper Cone Wreath:
- Hot Glue Gun (guess I should of cleaned up my glue gun for the photo- Ack!)
- 8-12×12 sheets of double sided card stock
- Fluid chalk or ink
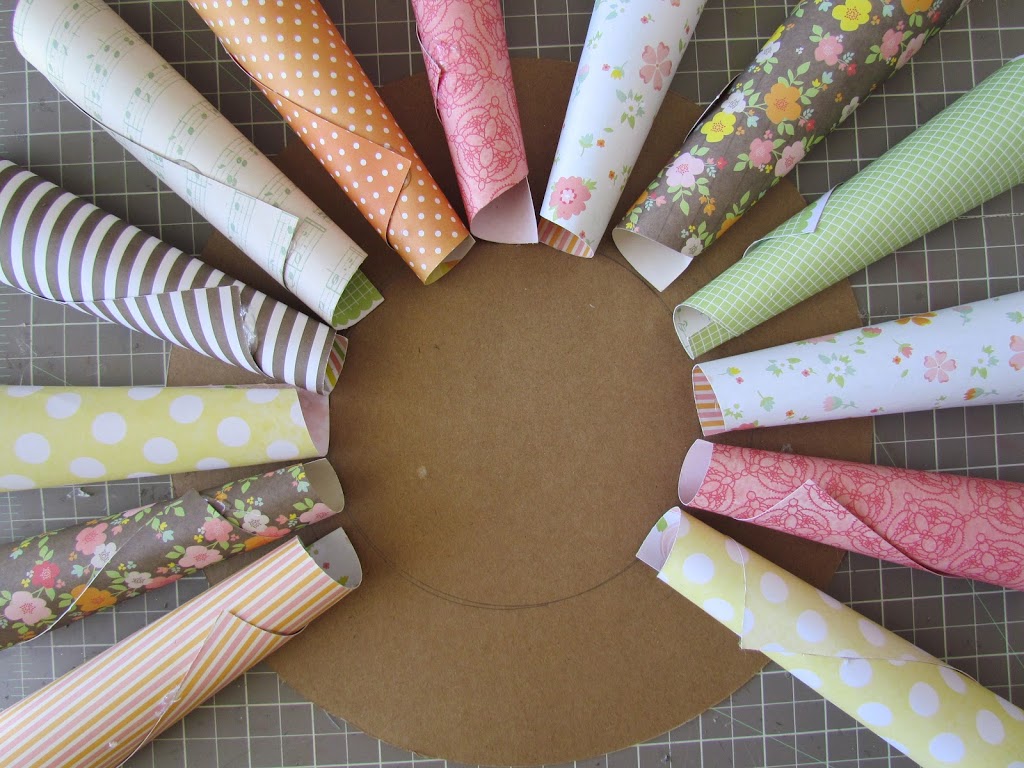
- 1-12 inch cardboard circle
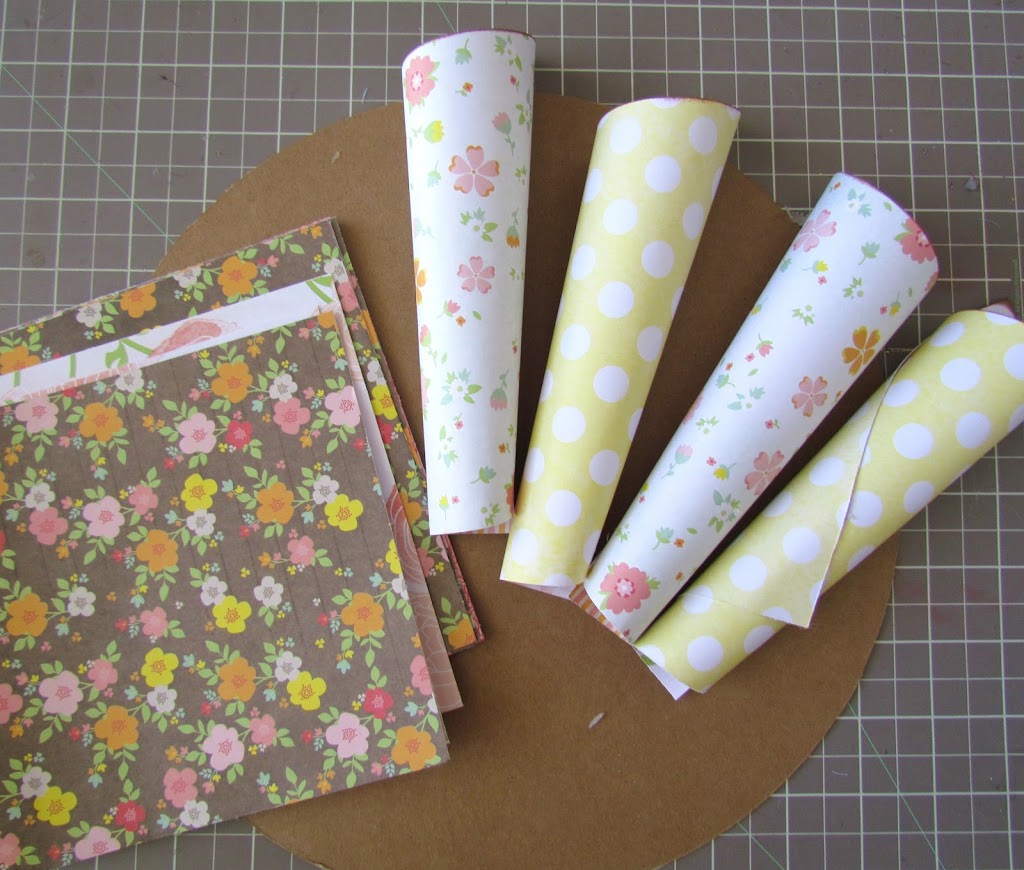
- Cut pattered paper into 6 x 6 inch squares.
- Roll into cones and hot glue together.
You’ll need to make approximately 17 cones for a 12″ wreath. Ink the edges of the cone as desired.
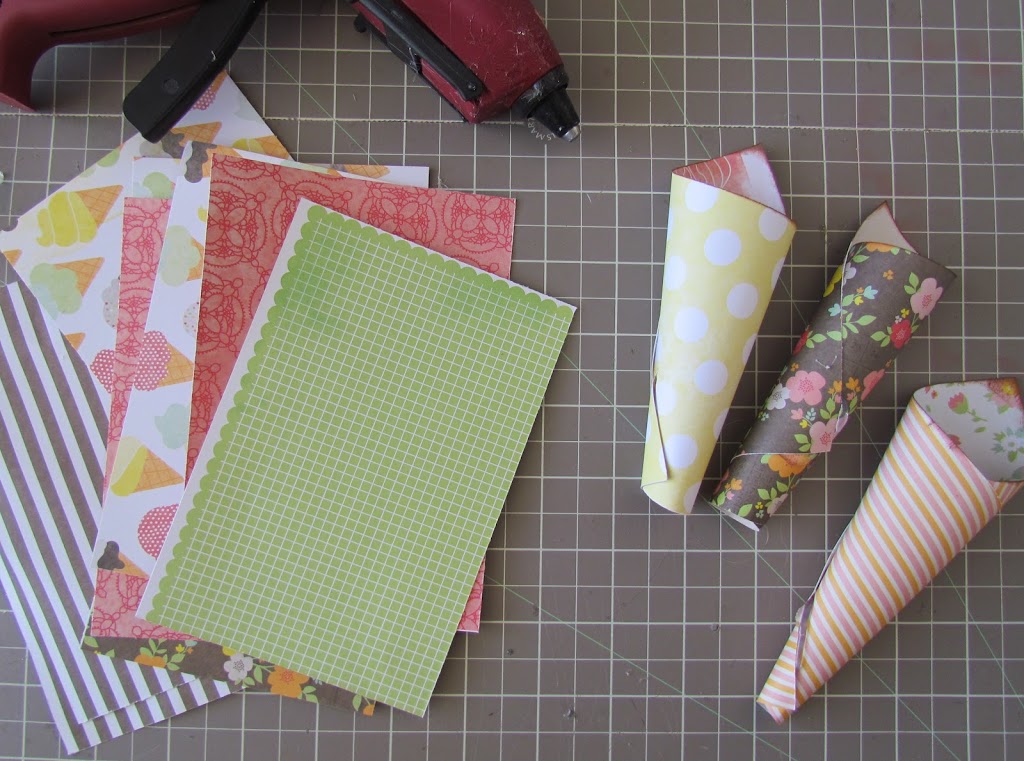
For the wreath’s second layer:
- cut patterned paper into 4 x 6 inch pieces.
- Roll them into cones and hot glue together.
You’ll need to make approximately 17 cones also for the second layer. Ink edges as desired.
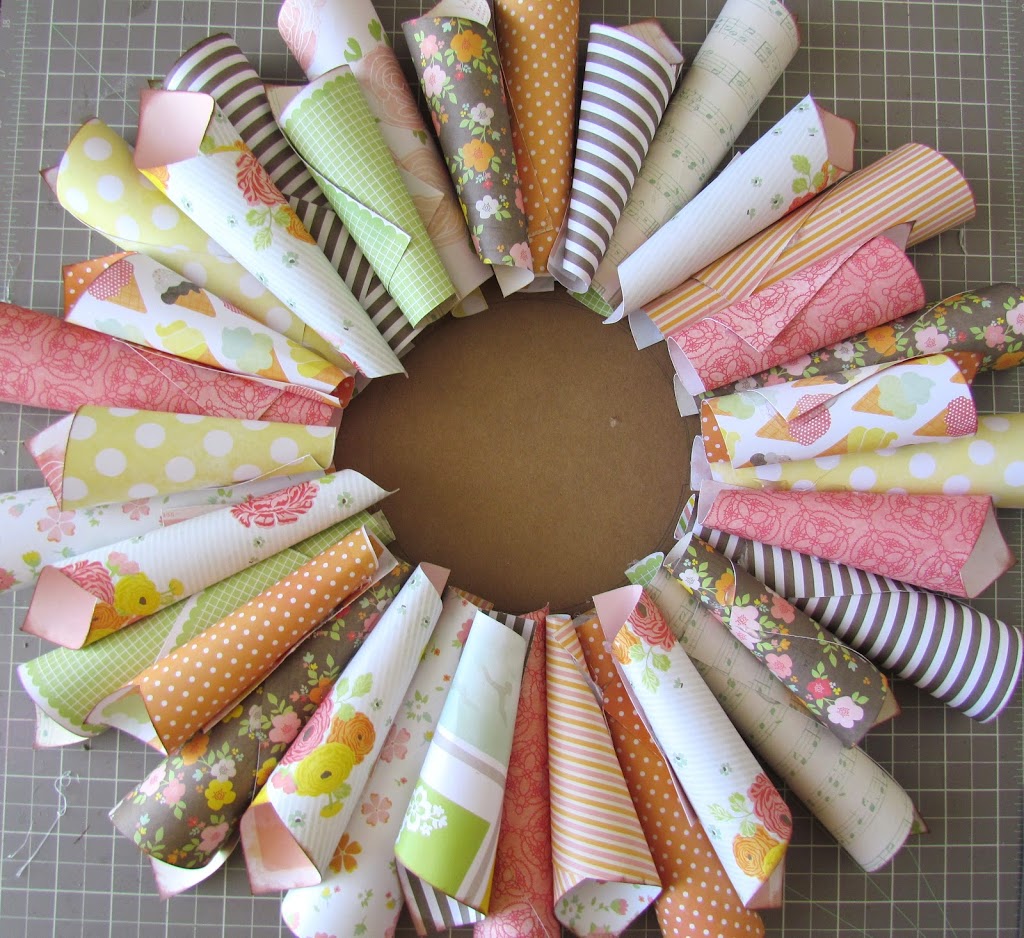
- Hot glue the 4 x 6 cones to cover the gaps between the first cone layer.
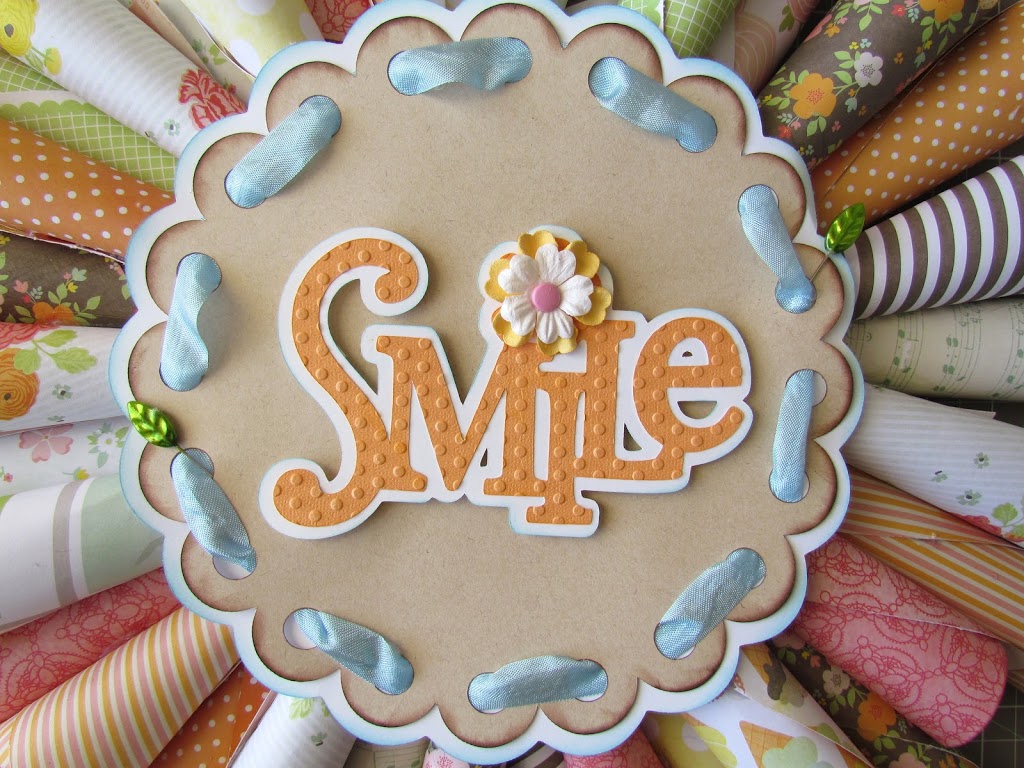
For the center of the wreath, I added an 8 inch scallop circle and shadow cut from Cricut Elegant Edges and embossed a sentiment cut from Gypsy Wanderings. I laced seam binding ribbon throughout the circle scallop and stuck in a couple of cute leaf stick pins. Doesn’t this Paper Cone Wreath make such a pretty statement?!


 Kate (Small Bits of Paper) says
May 22, 2012 at 1:12 pmThis is gorgeous – especially with the inking! I’ve never seen a paper cone wreath before and love the idea. Yours has turned out wonderfully!
 Madison says
May 22, 2012 at 11:28 pmHolly, this is really pretty! I love pretty paper too and then hate cutting it up!!! TFS the tutorial.
~Madison Funkycards.blogspot.com
 Megan says
May 23, 2012 at 3:11 amThis is amazing! I will have to give it a try sometime! Beautifully done!
 julie says
May 23, 2012 at 6:36 amOH MY GOSH I love your wreath its so bright and cheerful. That sure would make anyone smile when they come to the front door. It’s ssssoooooo darn cute. Thanks for shareing, God bless you and yours.
1205love@gmail.com
 LeAnne says
May 23, 2012 at 2:35 pmOh my goodness, this is so cute! I did a wreath like this with music from an old hymnal, but I love the springy look of this one!
 Jodi Collins aka Kharmagirl says
May 23, 2012 at 4:19 pmHow COOL is this! I have to try my hand at one of these! Thanks for playing along with us at the Ribbon Carousel!
 Runs with Scissors says
May 23, 2012 at 5:51 pmFabulous! And what a great way to show off all those great papers! The inking really ties them all together too.
 Lori Apgar says
May 23, 2012 at 7:16 pmGorgeous wreath!! Love the papers you used and love the center piece! Saw this at Sarah’s Link it up Tuesday!!
 Loretta Hughes says
October 13, 2019 at 3:54 amWhat is inking ?
 Holly Gagnon says
November 6, 2019 at 7:41 pmHello Lori,
Inking is dabbing an ink pad along the edge of paper to provide a subtle contrast. Thanks for visiting. Holly
 Kate says
May 23, 2012 at 10:14 pmThis is just Gorgeous and I love the papers you used. Awesome Creations. Thank you so much for joining us over at GoFish! Challenge . Hope to see you again.
Hugs,
Kate
 Sherrie K. says
May 24, 2012 at 1:44 amGORGEOUS wreath and I LOVE all the fun papers:) Thanks so much for joining us in the challenge at Go Fish!
Sherrie K
http://sherriescraps.blogspot.com
 Froggie says
May 24, 2012 at 2:37 amWay too cute. I love it. I have so much scrapbooking paper I need to try this. Thanks for the inspiration.
 Olivia says
May 24, 2012 at 2:52 amSuch a fabulous idea. Thanks for the great tutorial and for joining us at Cookin with Cricut. Come back soon!
Olivia-DT ormcraftynights.blogspot.com
 Jennie Larsen says
May 24, 2012 at 4:44 pmTHIS IS SO TOTALLY ADORABLE, i love it! WELL DONE! winks, jen
 Jennie Larsen says
May 24, 2012 at 10:01 pmP.S. YOU INSPIRED ME… CHECK OUT MY BLOG! winks, jen
 Tasha Hart says
May 24, 2012 at 10:13 pmI love this wreath and saw Craft-o-maniac’s post of FB and have got to create one of these… I love this and am totally inspired! Thank you! Beautiful job! Look forward to doing a blog feature with your project (if that is ok with you)
 Donna Schnees says
May 24, 2012 at 10:59 pmWhat a neat creative idea and I like that it is super easy! TFS
 Suzanne cricutcraftingrammyblogspot.com says
May 24, 2012 at 11:52 pmAwesome wreath and love the papers you used. Also love the way you did the center with the ribbon. Thanks for joining us at CWC this week for the Pinkalicious challenge.
 Emily (stampingout on SCS) says
May 25, 2012 at 1:42 pmOh, I absolutely ADORE this wreath! LOVE! Thank you so much for playing along with Go Fish Challenge! 🙂
 Michelle says
May 25, 2012 at 3:43 pmHolly this is so cute…I LOVE the paper too! I SO hear ya on cuttin up paper!! 😉
Hugs,
Michelle
 Charlene says
May 26, 2012 at 1:40 amAdorable!
 Jill says
May 26, 2012 at 4:41 amAMAZING…as always! LOVE the “SMile” in the middle! Absolutely Perfect! Smiles, Jill
 scrapqueen141 says
May 26, 2012 at 5:11 pmThis is amazing! Great work! Love it! Thank you for joining us at Cookin With Cricut this week!
http://scrapqueen141.blogspot.com/
 Andrea Ewen says
May 27, 2012 at 11:47 pmHow clever and creative! Beautiful colors, wonderful papers and fabulous sentiment! You sure put a lot of work in to this masterpiece…and it shows! Thanks for playing along in our challenge at the Ribbon Carousel!
 Melin says
May 28, 2012 at 11:33 amWhat a great project Holly! I love your paper choices and overall color palette. They all seem to just match so well! Thank you so much for sharing with us at CookingWithCricut.com
Melin
Blog: CookingWithCricut.com
Shop: PaperCraftingWorld.com
 Pink Cricut says
May 29, 2012 at 12:13 amWow-this is so gorgeous! I think i might try one – thanks for the tutorial!
 Larelyn says
May 30, 2012 at 1:41 pmOh Holly, this is just so wonderful! Thanks for the great tutorial as well. So glad you shared with us at Cooking with Cricut.
Hugs,
Larelyn
 Gretchen says
August 6, 2012 at 4:20 amthis is beautiful!!
 dani says
December 3, 2012 at 2:01 pmany suggestions on how to do this without hot glue?
 Dawn Ruth says
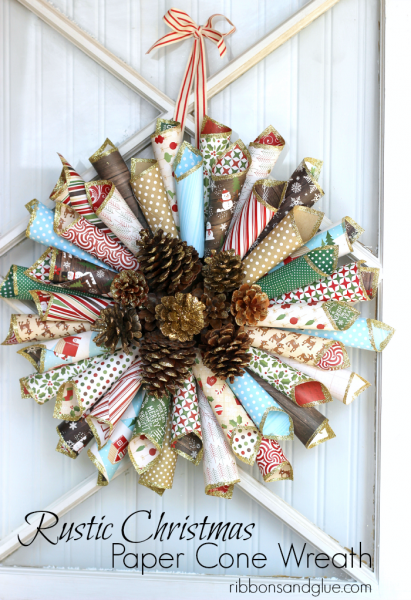
March 5, 2013 at 10:16 amThis is really fab I love the idea I think I might try it for Christmas it would make a great wall display. And at last I can use my glue gun ha ha
http://dawnthecrafter.blogspot.co.uk/
 chillin with Quillin says
March 5, 2013 at 5:21 pmcute wreath, love it !!!
Paula
 kateri says
May 10, 2013 at 6:17 amLove this wreath and I plan on making it. This might be the thing to get me out of my creative doldrums.