
Here’s a simple tutorial on paper tearing and chalking techniques. I actually learned this paper tearing technique from a scrapbooking demonstration that I attended on a Royal Caribbean Cruise years ago. The chalking was something else I’ve learned on my own. What a great vacation, huh? Sun, food and scrapping!

{This post contains affliate links referencing products used}
Chalk is subtle way enhance a project. You can add more or less chalk by simply blending the color with a cotton ball or applicator unlike if you were to use ink pads.
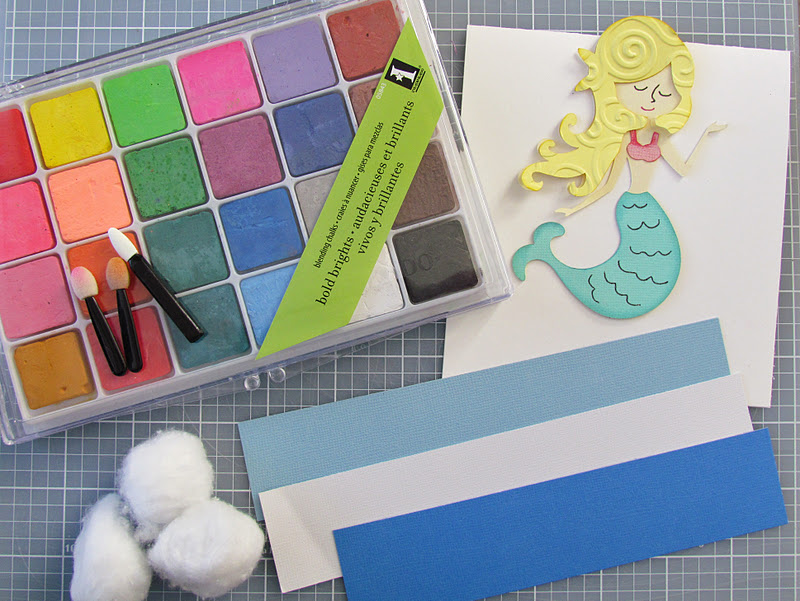
Supplies Used to make this card:
*Cotton Balls and eyeshadow applicators (I just use cheap dollar store applicators).
* White Card Base
* 3- 1 inch white-core cardstock strips in blue tones for ocean colors.
* 3- 1 inch white-core cardstock strips in blue tones for ocean colors.
*Die-cut with a body or face that can be enhanced with chalk. I used the Mermaid cut from
Life’s a Beach cartridge.
* Stamped sentiment
Life’s a Beach cartridge.
* Stamped sentiment
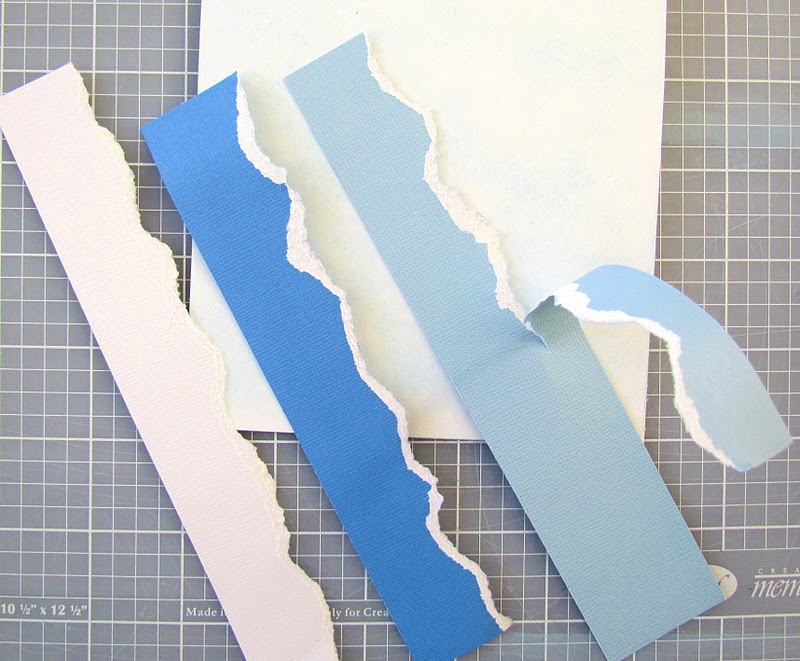
When you tear paper you either want to tear towards you or away from you. In this example, I’m tearing towards me because I want to see the white core. If you tear away from you, you’ll still see the rough edge but not the white core.
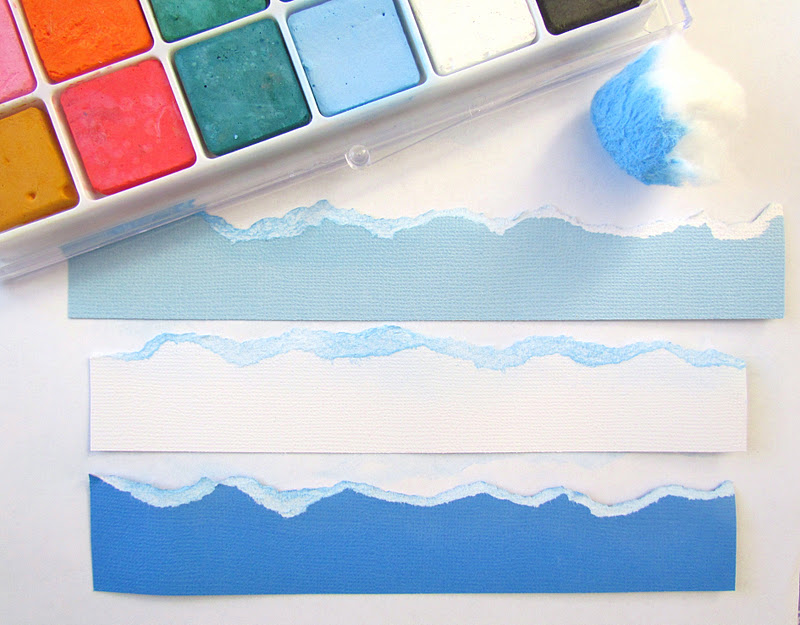
Using a cotton ball, choose a color you want to chalk with and cover the white torn edges as desired .
Using your cotton ball again, chalk the white background of the card in a circular motion to make the look of clouds or sky.
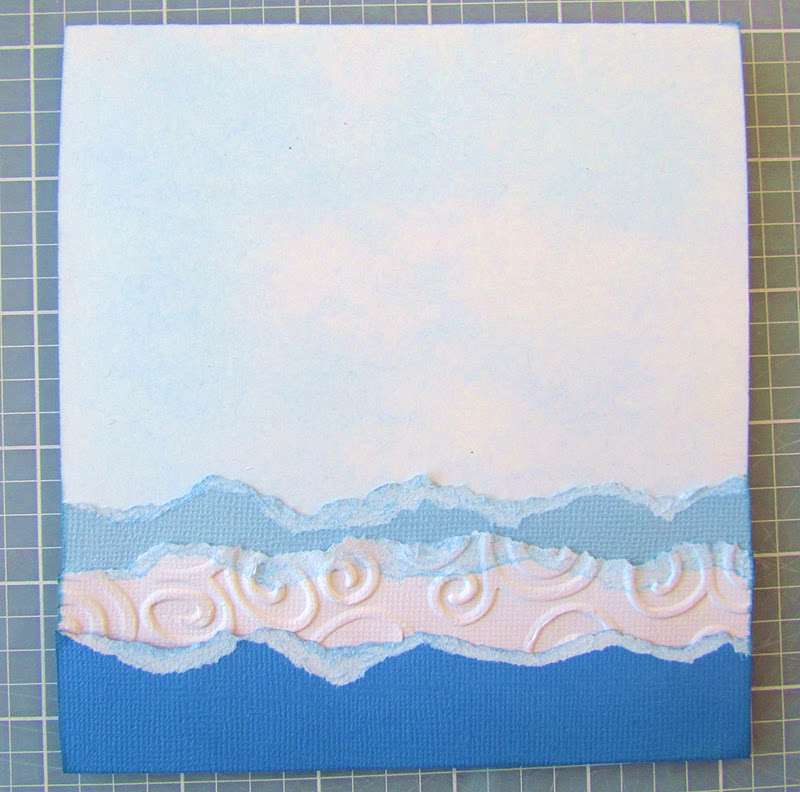
Layer and adhere the waves on your card. Remember you’re making waves, they’re suppose to look uneven. For more added texture, I embossed a layer with a swirl embossing folder.

Now I want to add a little bit of color to my Mermaid. Using an applicator, I added some pink to her cheeks, a little bit of tan to her skin and some yellow highlights in her hair. For detailed chalking, I like to use an applicator and blend with a cotton ball if needed.

So here she is…….enhanced with a sun-kissed tan and flowing blonde hair. I mean she is a Mermaid!
Click to view a few more examples of paper tearing & chalking:


 Jovan says
February 22, 2012 at 2:18 pmEverything looks so great…You make me want to run out and buy chalk!
 ScrappyRae10 says
February 22, 2012 at 8:26 pmLove all of your projects!! Aweasome Job! Thanks for playing along with CTO!!
 Adrian says
February 22, 2012 at 9:40 pmVery pretty projects, thanks for playing @ CTO!
 Amy says
February 23, 2012 at 1:01 amGreat projects- love that mermaid card! Thanks for playing at CTO this week!
:)Amy
Amy’s Crafting Space
Celebrate The Occasion Design Team Member
 Patricia says
February 23, 2012 at 3:39 pmSo adorable…love the texture!
 Miranda says
February 23, 2012 at 5:42 pmThese are adorable! TFS
Miranda 🙂
http://www.nanasscrapspot.com
 Lisa says
February 23, 2012 at 10:33 pmAwesome tutorial, Holly!! I have that same case of chalk and never think to use it…I just seem to grab inks. Thanks for reminding me how fabulous the chalk looks!! And of course I LOVE the mermaid card!! 🙂
Lisa
A Mermaid’s Crafts
 Tammy says
February 23, 2012 at 10:36 pmVery cute cards. Love all the detail you put into it.
 girlia says
February 24, 2012 at 7:53 pmcute. Thanks for joining us at CTS
 Expressions By Elaine says
February 24, 2012 at 9:21 pmYour mermaid is too cute! love the paper tearing!
Thanks for joining us at Cardz Tv:)
 Melissa says
February 24, 2012 at 9:23 pmCute card, thanks for joining CCC!
 Dilsaver Designs says
February 25, 2012 at 5:42 amSo cute, love the pretty pink flower in her hair! Thanks for joining us @ CTO for our “Thinking of You” challenge 🙂
 Naomi Edwards says
February 25, 2012 at 3:57 pmLovely job!!! You certainly have the tearing and chalking techniqes down! I am going to have to try this… the colors are so fun and uplifting..I love love love these cards.
http://scrapbookingforbeginners-naomi.blogspot.com/
 The Queen (Laura) says
February 25, 2012 at 3:57 pmShe is so cute! Thanks for joining us over at Cardz TV
 Kate says
February 25, 2012 at 7:16 pmWow! Everything looks awesome. Thanks for the tutorial too. Thank you so much for joining us over at Cardz TV Stamps “Anything Goes” Challenge. Hope to see you again.
Hugs,
Kate
 Sharon says
February 26, 2012 at 4:40 amThese are fantastic!! I so love the tearing and chalking. I still use my chalks some, but now I want to use them even more. Love the mermaid and those boots on the other card. Thank you so very much for joining our ‘Anything Goes’ challenge at Cardz TV!!!! 🙂
 Esther says
February 26, 2012 at 6:19 amShe is fabulous! Your torn paper waves and embossing are wonderful touches!
Thanks for joining CTO this week
 girlia says
February 26, 2012 at 2:59 pmThanks for joining us at CTO this week.
 Karen says
February 26, 2012 at 9:27 pmHi Holly you did a great job with the mermaid I struggled so when I tried this cut. Thanks so much for joining Cardz TV challenge. Karen
 Arcy Scraps says
February 26, 2012 at 10:50 pmHolly! This is BEAUTIFUL!!!! i saw it on fccb and its soooo super cute!
Your newest follower,
♥ Cyndy
 Sonya says
February 27, 2012 at 4:20 pmSuper cute!!
 Sherrie K. says
February 28, 2012 at 3:26 amBeautiful card…awesome tutorial! I also wanted to say congratulations to you on your FCCB DT spot! I am excited to be on the team with you! I am a new follower of yours also:)
Sherrie K
http://sherriescraps.blogspot.com
 Karen says
February 28, 2012 at 4:12 amHolly, congrats on the DT call at FCCB. I am on the team as well and look forward to working with you.
 Marcea says
March 1, 2012 at 1:52 pmGorgeous card and really fab papers!!!!Thanks for joining us on Simon Says Stamp Challenge Blog last week. We have a new challenge up so please pop over and join in the fun.
-x-